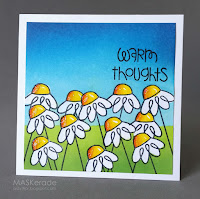
One of Laura Bassen's lessons in the Online Card Class "Background check" was doing ink blending in the middle of a card - it is more difficult to get a nice, blended look when starting with the blending tool on the cardstock rather than off to the side. I was so careful to get a nice blend in the centre, with the three colours mixing just enough but not too much - and then I decided to cut a butterfly out of the centre, anyway! LOL!
I'll also be sharing this card over at the Simon Says Stamp Wednesday Challenge - this week, it is Anything Goes.
Thanks for visiting :)
Thursday, 30 July 2015
Background Check!
There's a new Online Card Class on - it is called Background Check, and it is right up my alley!
For this card, I used the Bold Paisley Stencil from My Favorite Things, along with four different Distress Ink colours (spiced marmalade, abandoned coral, worn lipstick and picked raspberry). The sentiment is from Hero Arts Stamp & Cut Thanks, and the sequins from Simon Says Stamp.
I'll also be sharing this card over at the Simon Says Stamp Wednesday Challenge - this week, it is Anything Goes.
Thanks for visiting :)
Saturday, 25 July 2015
Revisiting an idea
I made a couple of cards similar to these ones for A Blog Named Hero last week (see THIS POST), but I wanted to try with a different background stamp, and a different colour.
I used the Garden Tile Pattern background stamp from Hero Arts, white embossed onto watercolour paper (I didn't really need the watercolour paper, but I had originally planned to add watercolour paints, but then changed my mind!), along with Cracked Pistachio, Mermaid Lagoon and Peacock Feathers Distress Inks. The first sentiment is from Stamp-It, the second is "A very special birthday" from Hero Arts.
Thanks for visiting :)
Tuesday, 21 July 2015
A new challenge at A Blog Named Hero
The latest challenge is up at A Blog Named Hero - and it is to let the sentiment be the star!
I used my Lawn Fawn Quinn's alphabet dies to create a negative mask, and stamped Hero Arts Garden Tile Pattern over the top. Then I used my Copics to colour in the spaces so it looks a bit like a mosaic (When I was in primary school we used to do squiggly patterns on a page, and then colour in the spaces - this was a bit like that!) . I removed the mask, and I then went around the letters with little dots. I added the word "birthday" from a Hero Arts set called "Say it All", but there are LOTS of Hero Arts stamps I could have used for that word! The final touch was a coat of Wink of Stella over the "happy", and I was done!
Make sure you go and visit A Blog Named Hero to see all the rest of the design team creations, and to link up your own version of the sketch!
As always, our generous sponsor, Simon Says Stamp, has a $25 gift voucher for one of our entrants!
Thanks for visiting! :)
Monday, 20 July 2015
Pink ombre at A Blog Named Hero
I have a solo post up at A Blog Named Hero today - here's a sneak peek:
Thanks for visiting :)
Make sure to visit A Blog Named Hero to see both of the complete cards.
Wednesday, 15 July 2015
Sunshine and Laughter
Playing along with this week's MUSE challenge, provided by Ardyth!
This card started out very different - I had used much smaller flowers across the middle in a wave pattern - and I masked them with masking fluid. I dried the masking fluid with my heat gun on the low setting, and I think that might have been my mistake - when I removed it, it ripped the watercolour paper everywhere! So I stamped some large flowers to cover up the total mess I had made! (Note to self - don't use a heat gun to dry masking fluid, no matter how low a setting you use!)
Here's Ardyth's card:
Thanks for visiting :)
Sunday, 12 July 2015
It's raining, it's pouring
It has been raining. The. Whole. Day. I mean steady, soaking, don't-go-out-you'll-drown kinda rain.
So I've been making cards, and after looking at a couple of challenges, this one just popped into my head.
Thanks for visiting :)
So I've been making cards, and after looking at a couple of challenges, this one just popped into my head.
I'll be sharing this card at these three challenges (click for the links):
Thanks for visiting :)
Runway Inspired Challenge
A friend asked me for a wedding card just a couple of hours ago, and then I spotted the latest Runway Inspired Challenge! (actually, I spotted Heather's design team card for Runway Inspired Challenge!, and I was inspired!
I used my new Glorious Petal Stencil from Hero Arts for the background, inked in Iced Spruce Distress Ink. I then took a Ranger foil tape sheet and die cut the word "happy" from my new favourite, Hero Arts "Stamp & Cut Happy". I stamped the words "wedding day" onto some vellum, then glued the happy die cut and some Simon Says Stamp sequins onto the vellum too, before adding glue behind the die cut and the sequins to attach the vellum to the card front.

Thanks for visiting :)
I used my new Glorious Petal Stencil from Hero Arts for the background, inked in Iced Spruce Distress Ink. I then took a Ranger foil tape sheet and die cut the word "happy" from my new favourite, Hero Arts "Stamp & Cut Happy". I stamped the words "wedding day" onto some vellum, then glued the happy die cut and some Simon Says Stamp sequins onto the vellum too, before adding glue behind the die cut and the sequins to attach the vellum to the card front.

Thanks for visiting :)
Saturday, 11 July 2015
Rainbows!
The current challenge at A Blog Named Hero is a photo inspiration challenge - and all the photos have rainbows! Even though I wasn't on the team to provide inspiration for this challenge, I just couldn't let such an opportunity pass me by - I LOVE my rainbows! I just HAD to join in!
I used a stencil from Heidi Swapp to help me space the sunburst rainbow pattern. I then rotated it to add more rays of colour. I used the Hero Arts Stamp & Cut "Happy" set to die cut the "Happy" in black and stamp the "birthday" in black onto a strip of white cardstock, layered on a strip of black. I finished with a scattering of sequins from Simon Says Stamp.
Make sure you visit A Blog Named Hero to check out the AMAZING array of rainbowy goodness, and add your own creation to the inlinkz!
Thanks for visiting! :)
Thursday, 9 July 2015
Case-ing this sketch
I've been wanting to join in with the challenge at CASe this sketch all week, but only found time at the last minute!
I used Hero Arts "Little One" and Wplus9 "Party Animal" for this card, embossing the image and the sentiment in white. I then blended Distress Inks in Worn Lipstick and Spun sugar over the top panel (after die cutting the edge with the edge of a Spellbinders die). I then coloured the little giraffe with Distress Markers in Spiced Marmalade and Picket Fence. I thought the sentiment needed a bit more definition, so I created a shadow with a Copic Marker (W1). I thought the pink background looked too flat, so I sprayed a background stamp (Hero Arts Garden Tile Background) with water and stamped over the whole panel, which removed little bits of colour - not heaps, just enough to give a bit of texture. After mounting the panel onto a top-folding white card, the Simon Says Stamp sequins were the finishing touch.
Thanks for visiting :)
Subscribe to:
Comments (Atom)


